By Amit Jotwani
Developer Educator

This guide walks you through running your own copy of Fizzy on a single DigitalOcean Droplet using Kamal.
Fizzy is a modern, lightweight kanban tool from 37signals — simple, fast, and refreshingly direct. They sell a hosted version, but it’s also open source (with a few restrictions). If you enjoy owning your own software, or just like seeing how things work, you can host it yourself.
Kamal makes that possible without much machinery. You point Kamal at a server, give it SSH access, and it takes care of building, shipping, and running the app. No server prep. No Docker installation. Nothing to configure ahead of time. Kamal handles all of it.
Our goal is to get you from zero to a running Fizzy instance, in as few steps as possible.

Prerequisites
You’ll need:
- A GitHub account
- A DigitalOcean account
- Docker Desktop installed locally
- An SSH key added to your DigitalOcean account
Step 1: Fork the Fizzy Repository
Start by making your own copy of Fizzy:
-
Go to the Fizzy repository.
-
Click Fork.
-
Clone your fork locally:
git clone https://github.com/YOUR_USERNAME/fizzy.git cd fizzy -
Install dependencies:
bin/setup
Forking makes the project yours to edit, commit to, and update over time.
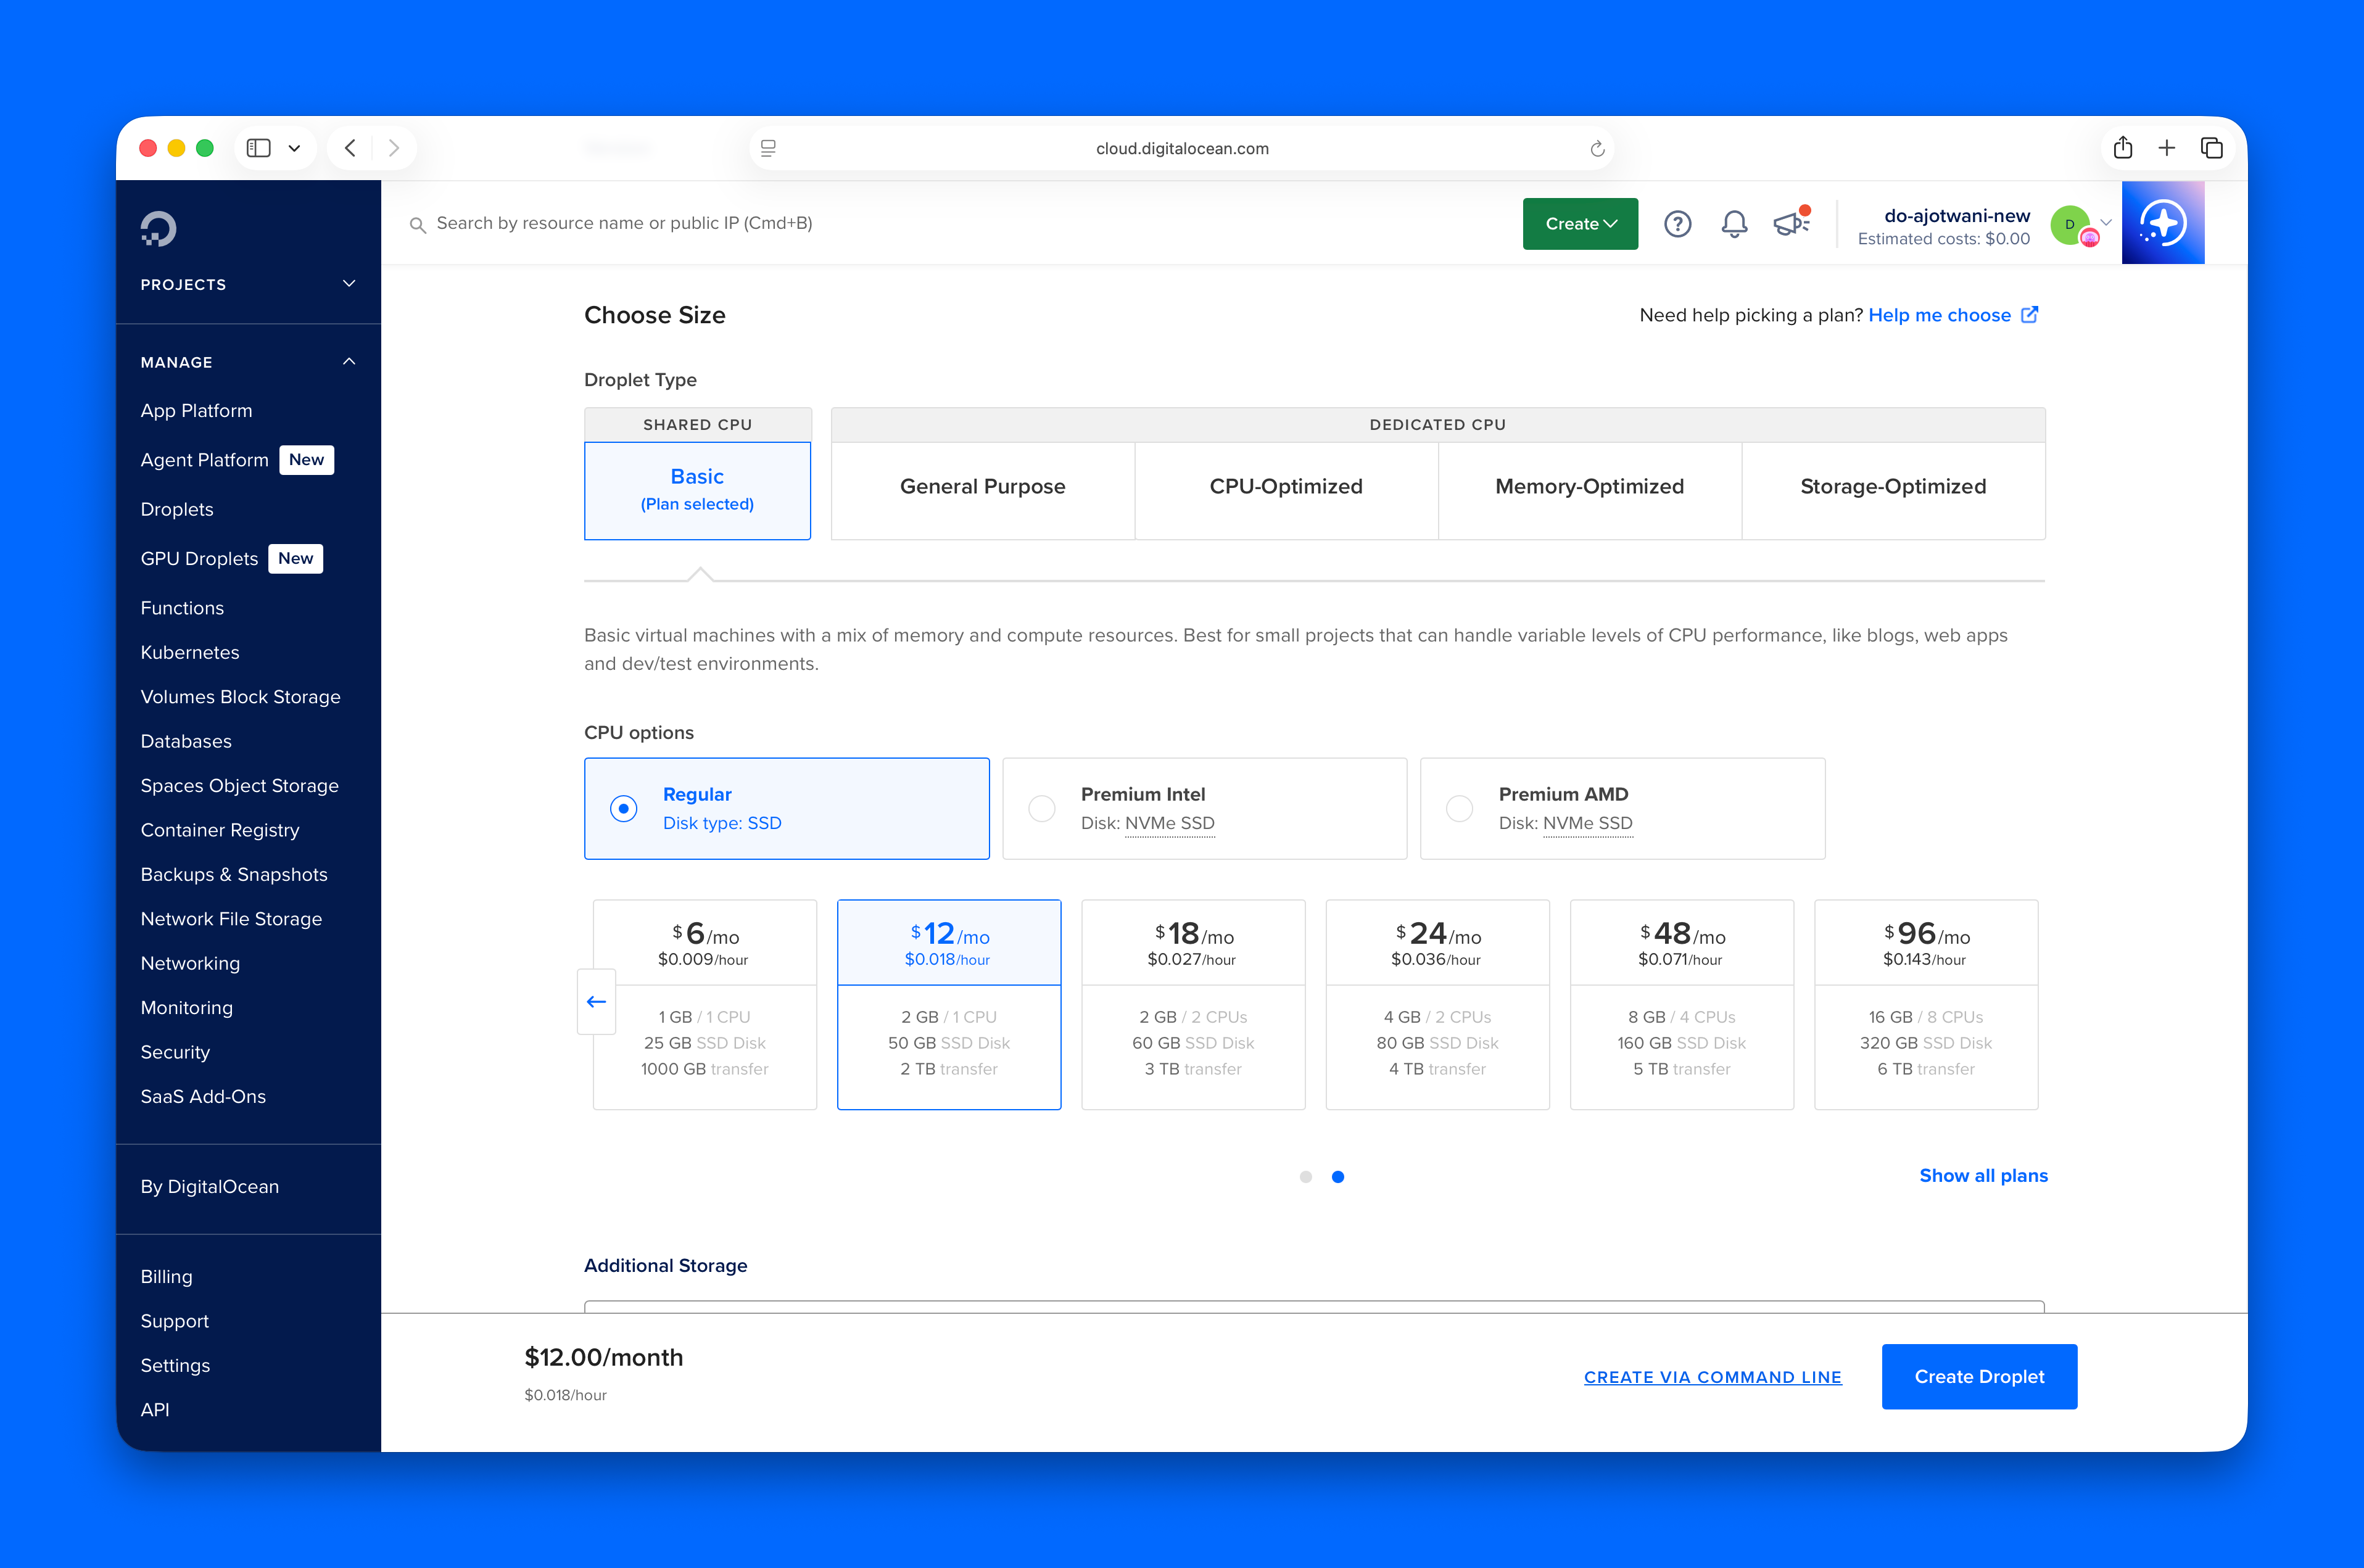
Step 2: Create a DigitalOcean Droplet
Create the server that will run the app:
-
Log in to DigitalOcean.
-
Create a new Droplet with:
- Image: Ubuntu 22.04 or later
- Size: At least 2GB RAM
- Region: Closest to your users
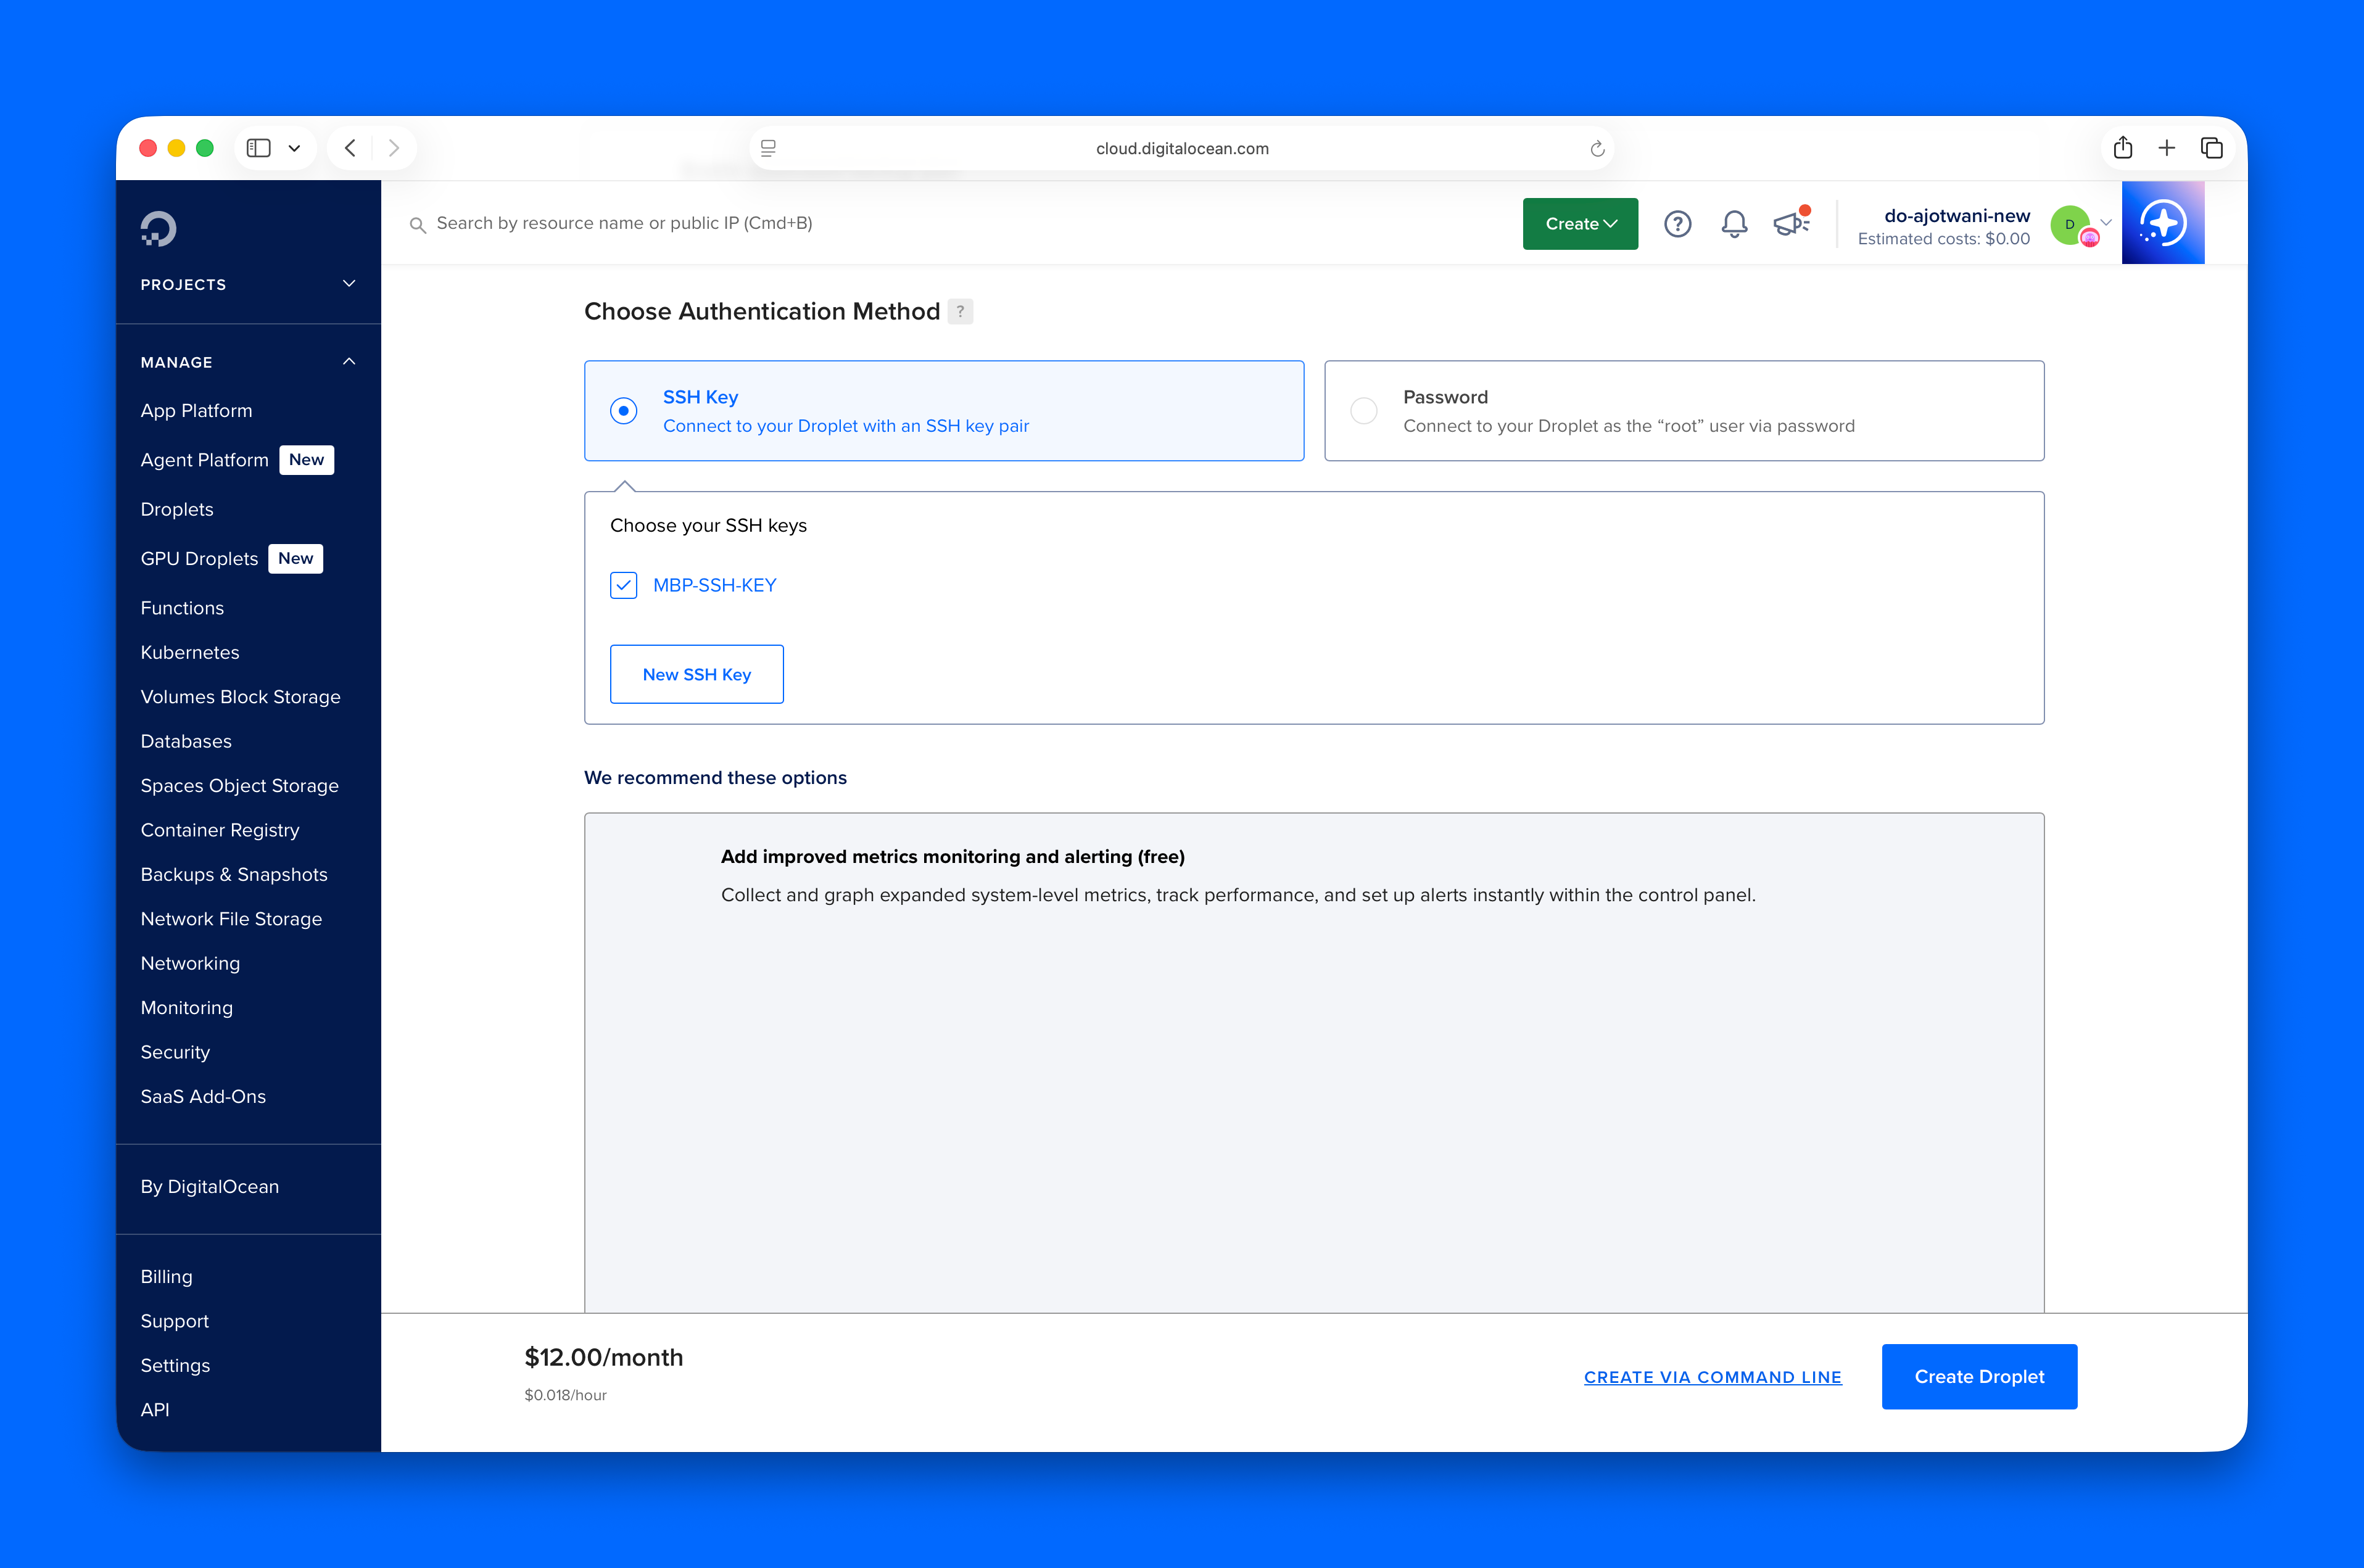
- Authentication: SSH key
-
Choose SSH as authentication method
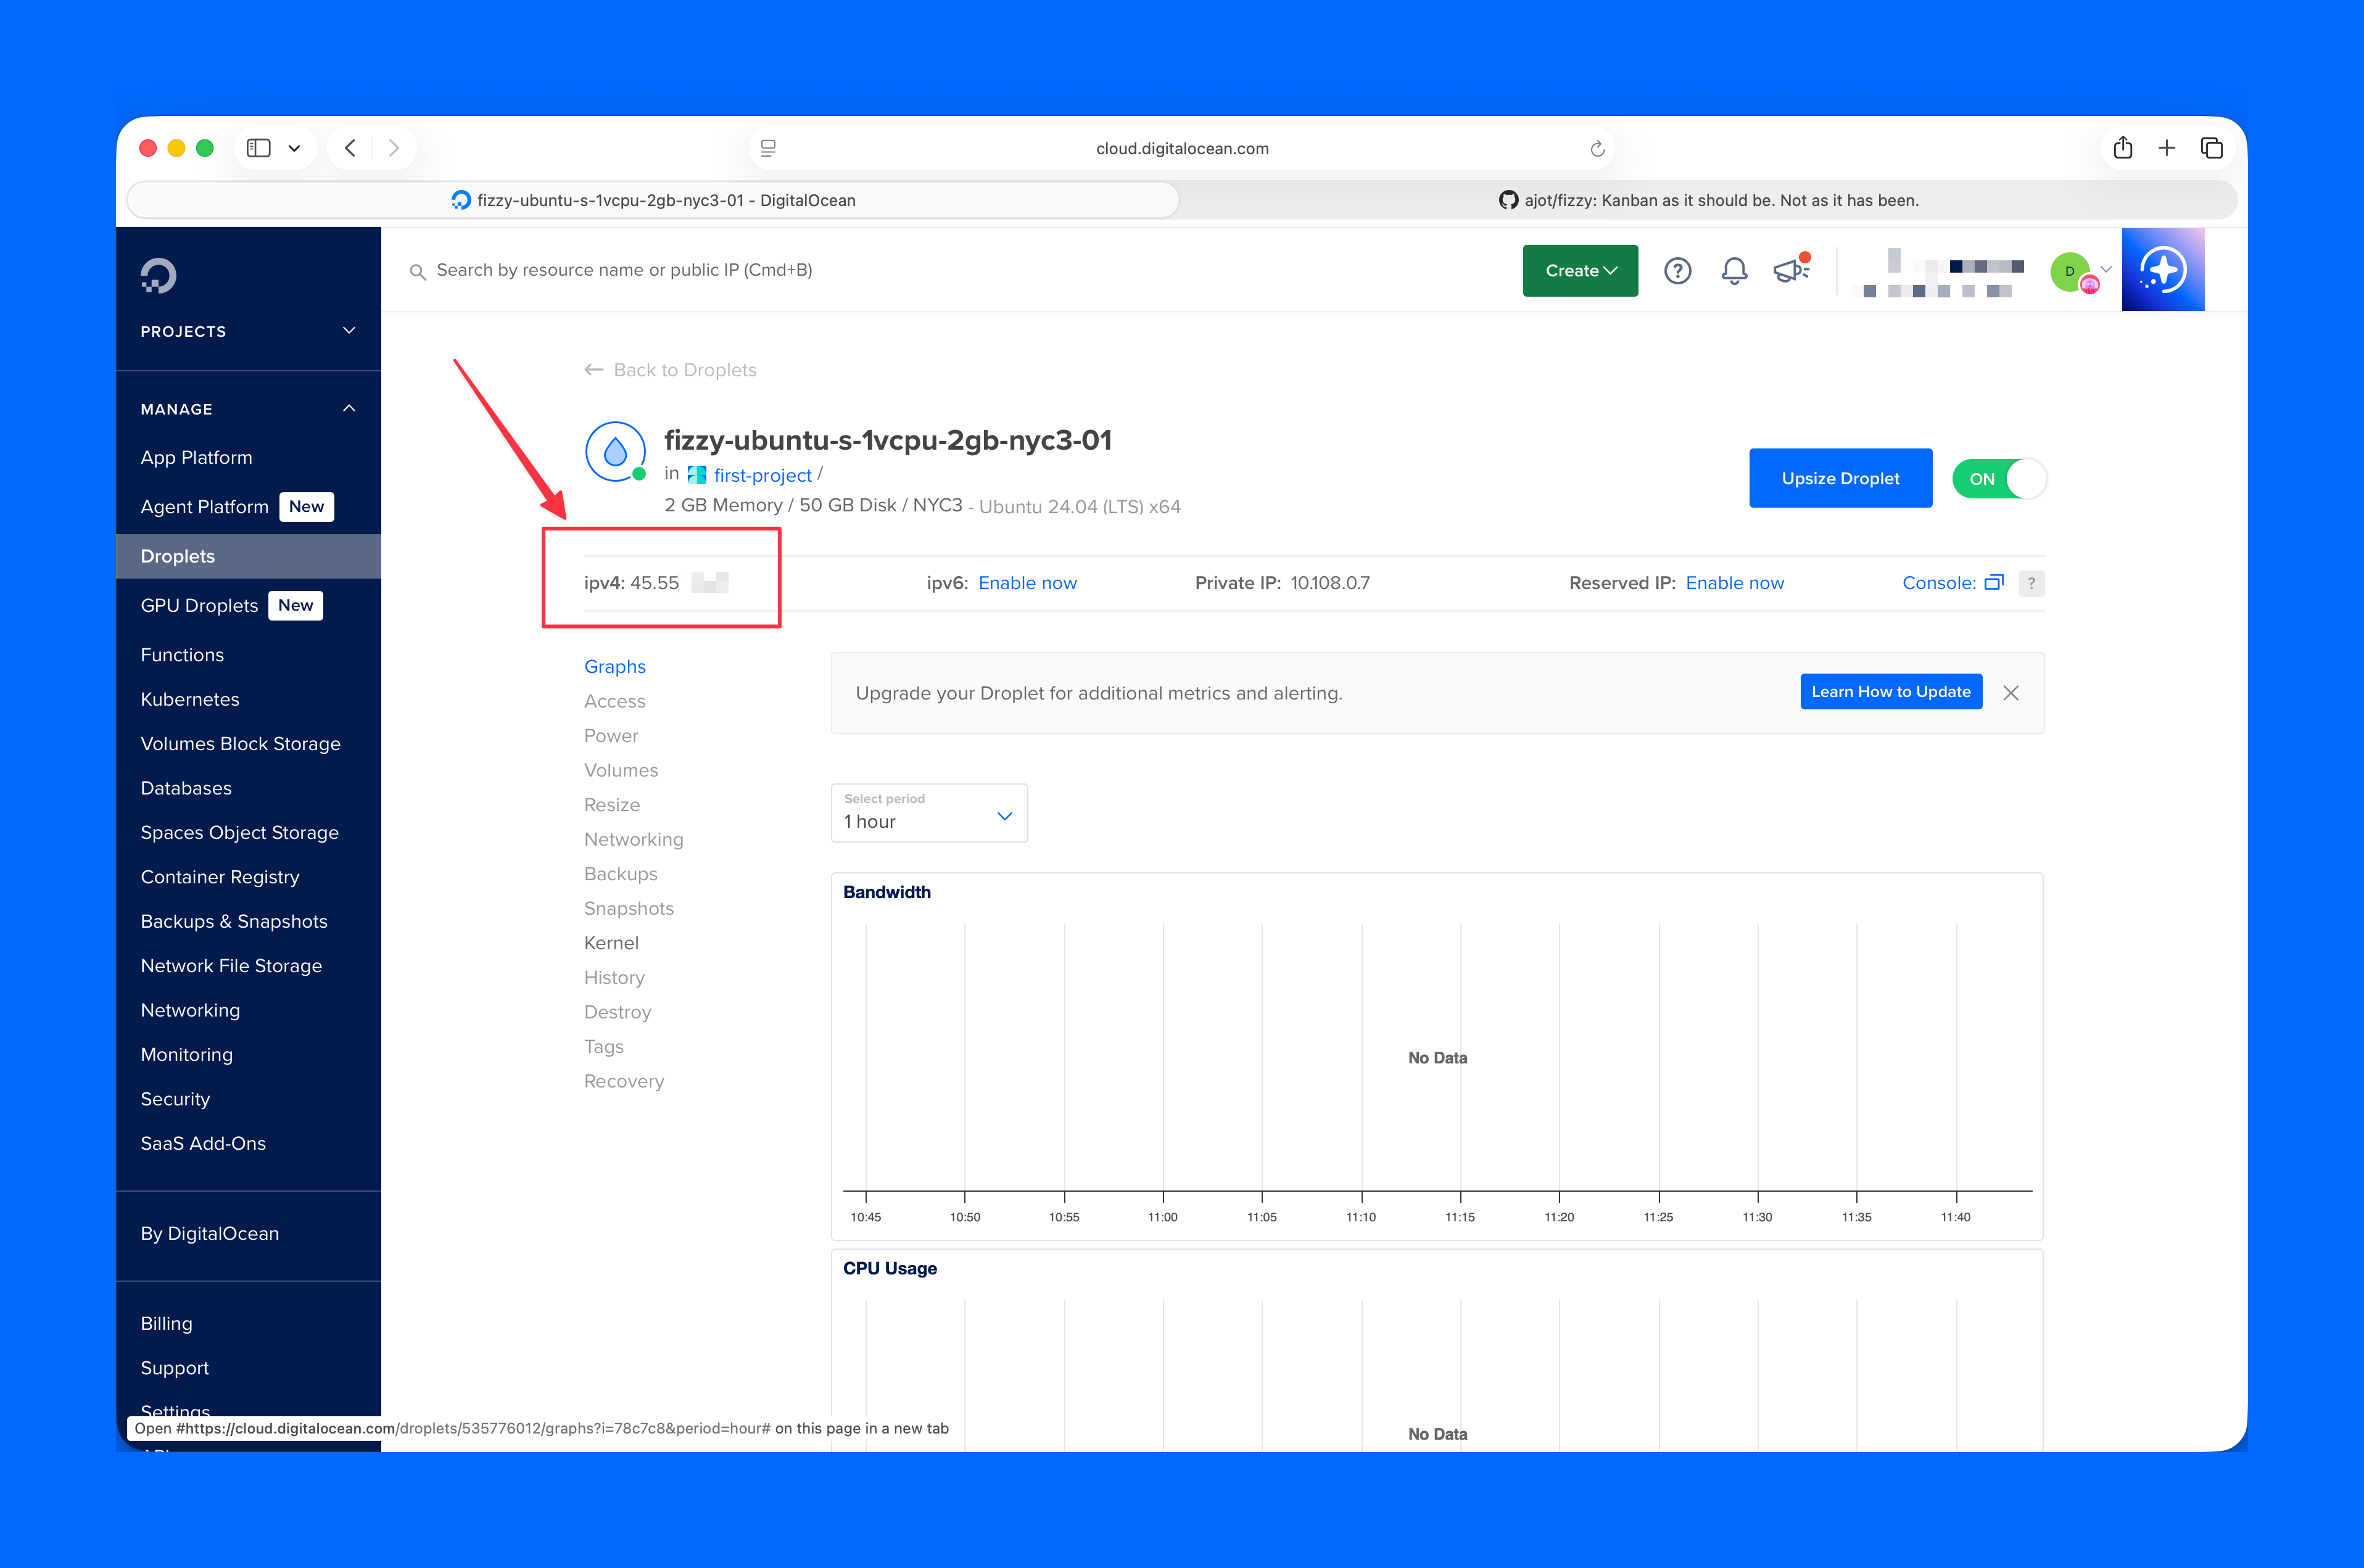
-
Copy the Droplet’s IP address for later.
Step 3: Configure Kamal for Deployment
Open config/deploy.yml.
We’ll make two changes:
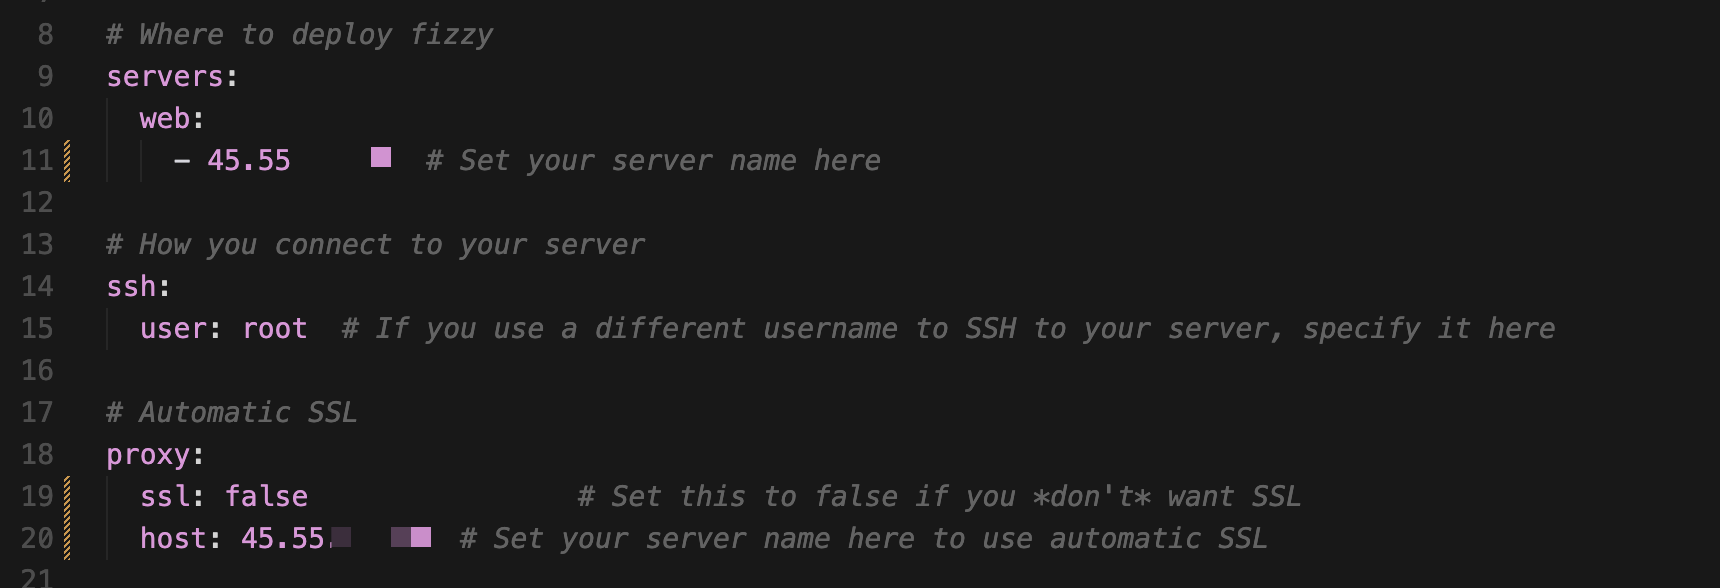
1. Add your Droplet’s IP address
Replace <YOUR_DROPLET_IP> in both places:
servers:
  web:
    - <YOUR_DROPLET_IP> #example: 45.12.34.56

proxy:
  host: <YOUR_DROPLET_IP>
Use your actual IP address.
2. Configure SSL
Choose the option that matches your setup:
Option A: With a domain (recommended)
For a secure production deployment, use a domain with SSL enabled.
- Add your domain to DigitalOcean and point it to your Droplet’s IP address
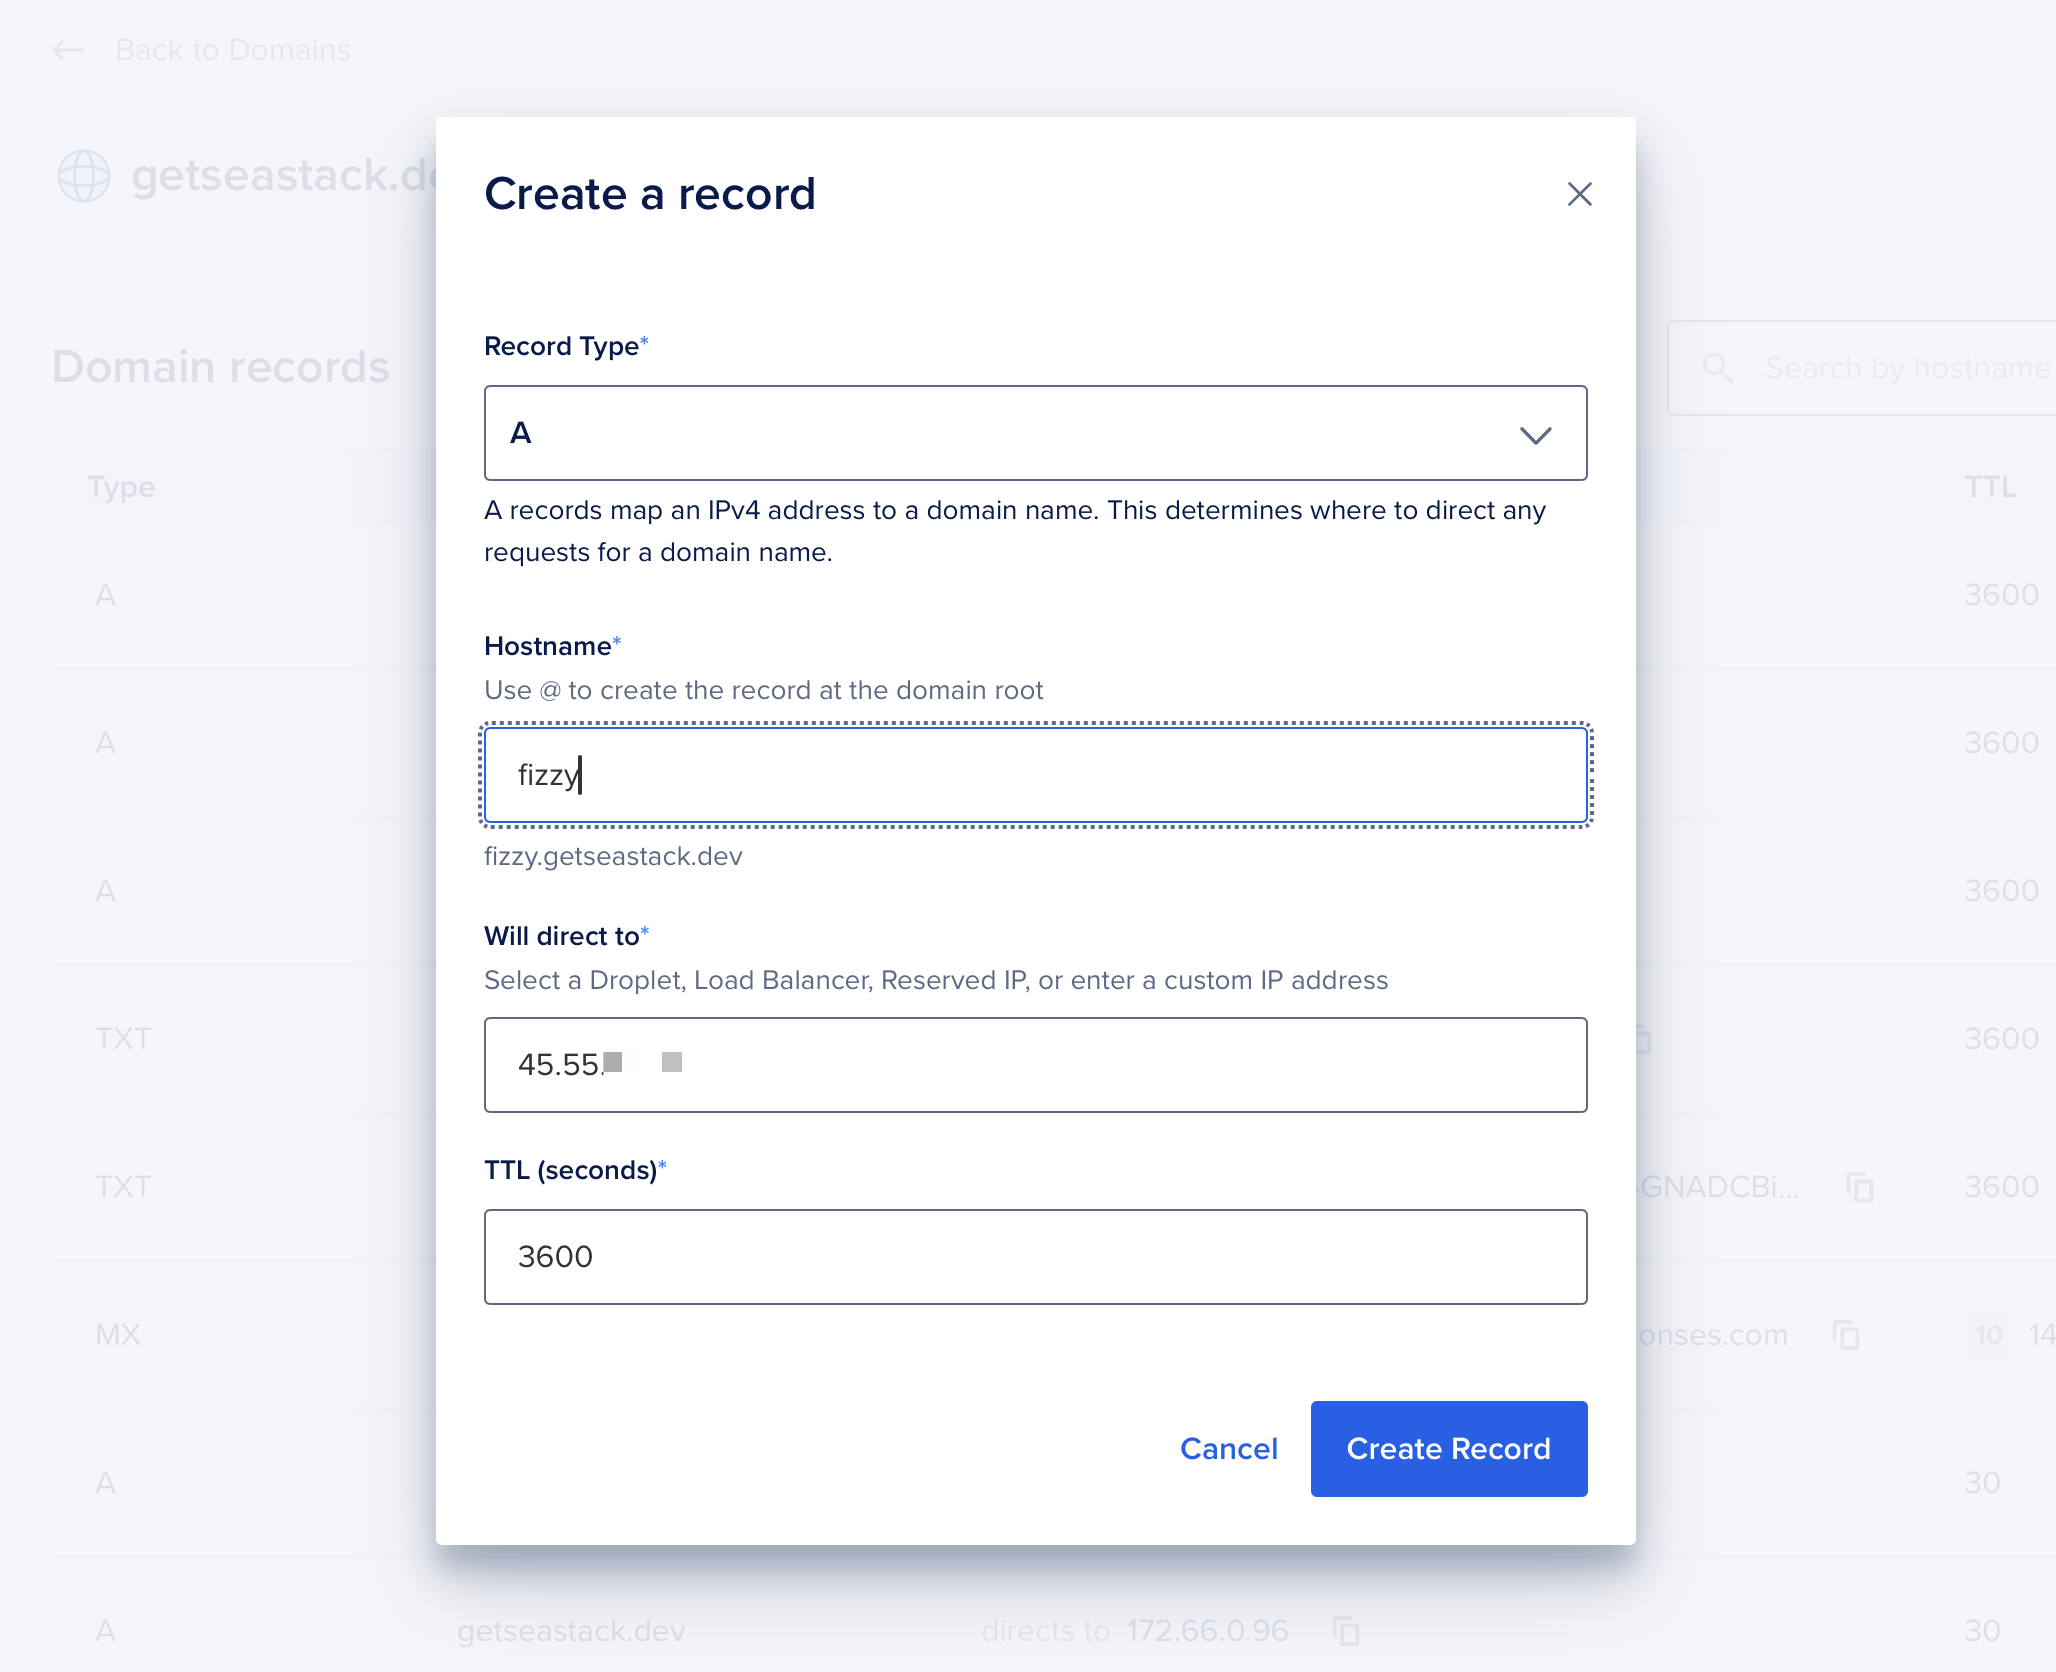
- Update
config/deploy.yml:
proxy:
  ssl: true
  host: fizzy.yourdomain.com
That’s it — Kamal will automatically provision an SSL certificate via Let’s Encrypt.
Option B: Without a domain (IP address only)
If you don’t have a domain yet, you can temporarily disable SSL to get Fizzy running. You can add a domain later.
Note: SSL certificates require a domain name — they can’t be issued for raw IP addresses.
Update config/deploy.yml in two places:
1. Disable SSL in the proxy:
proxy:
  ssl: false
  host: <YOUR_DROPLET_IP>
2. Tell Fizzy not to force SSL:
env:
  clear:
    ASSUME_SSL: "false"
    FORCE_SSL: "false"
    SOLID_QUEUE_IN_PUMA: true
(We’ll add email settings later.)
Warning: Running without SSL is fine for testing, but you should add a domain and enable SSL before using Fizzy in production. See the “Adding a Domain and Enabling SSL” section at the end of this guide.
3. Commit your changes
git add config/deploy.yml
git commit -m "Configure Kamal for IP deployment"
Step 4: Set Up Secrets
Kamal loads secrets from .kamal/secrets.
Create the file:
mkdir -p .kamal
touch .kamal/secrets
Then install Ruby gems:
bundle install
1. Generate the Rails secret key
bin/rails secret
Add it to .kamal/secrets:
SECRET_KEY_BASE=your_generated_key
2. Generate VAPID keys (for browser notifications)
VAPID keys identify your server when sending browser push notifications. These are required by the default deploy.yml configuration.
Open a Rails console:
bin/rails c
Then run:
vapid_key = WebPush.generate_key

puts "VAPID_PRIVATE_KEY=#{vapid_key.private_key}"
puts "VAPID_PUBLIC_KEY=#{vapid_key.public_key}"
Add both to .kamal/secrets:
VAPID_PRIVATE_KEY=your_private_key
VAPID_PUBLIC_KEY=your_public_key
Note: If you don’t need browser notifications, you can remove
VAPID_PUBLIC_KEYandVAPID_PRIVATE_KEYfrom theenv.secretsection indeploy.ymlinstead.
Step 5: Verify SSH Access
Make sure you can connect to your server:
ssh root@YOUR_DROPLET_IP
If it works, you’re ready to deploy.
Step 6: Ensure Docker Desktop Is Running
Kamal builds Docker images locally.
Start Docker Desktop, wait for it to be ready, and confirm:
docker ps
Step 7: Run Kamal Setup
From your Fizzy project directory:
bin/kamal setup
Kamal will:
- Install Docker on the Droplet
- Start a local registry
- Build the Fizzy image
- Push it to the Droplet
- Start the app
- Configure the proxy
This takes a few minutes the first time.

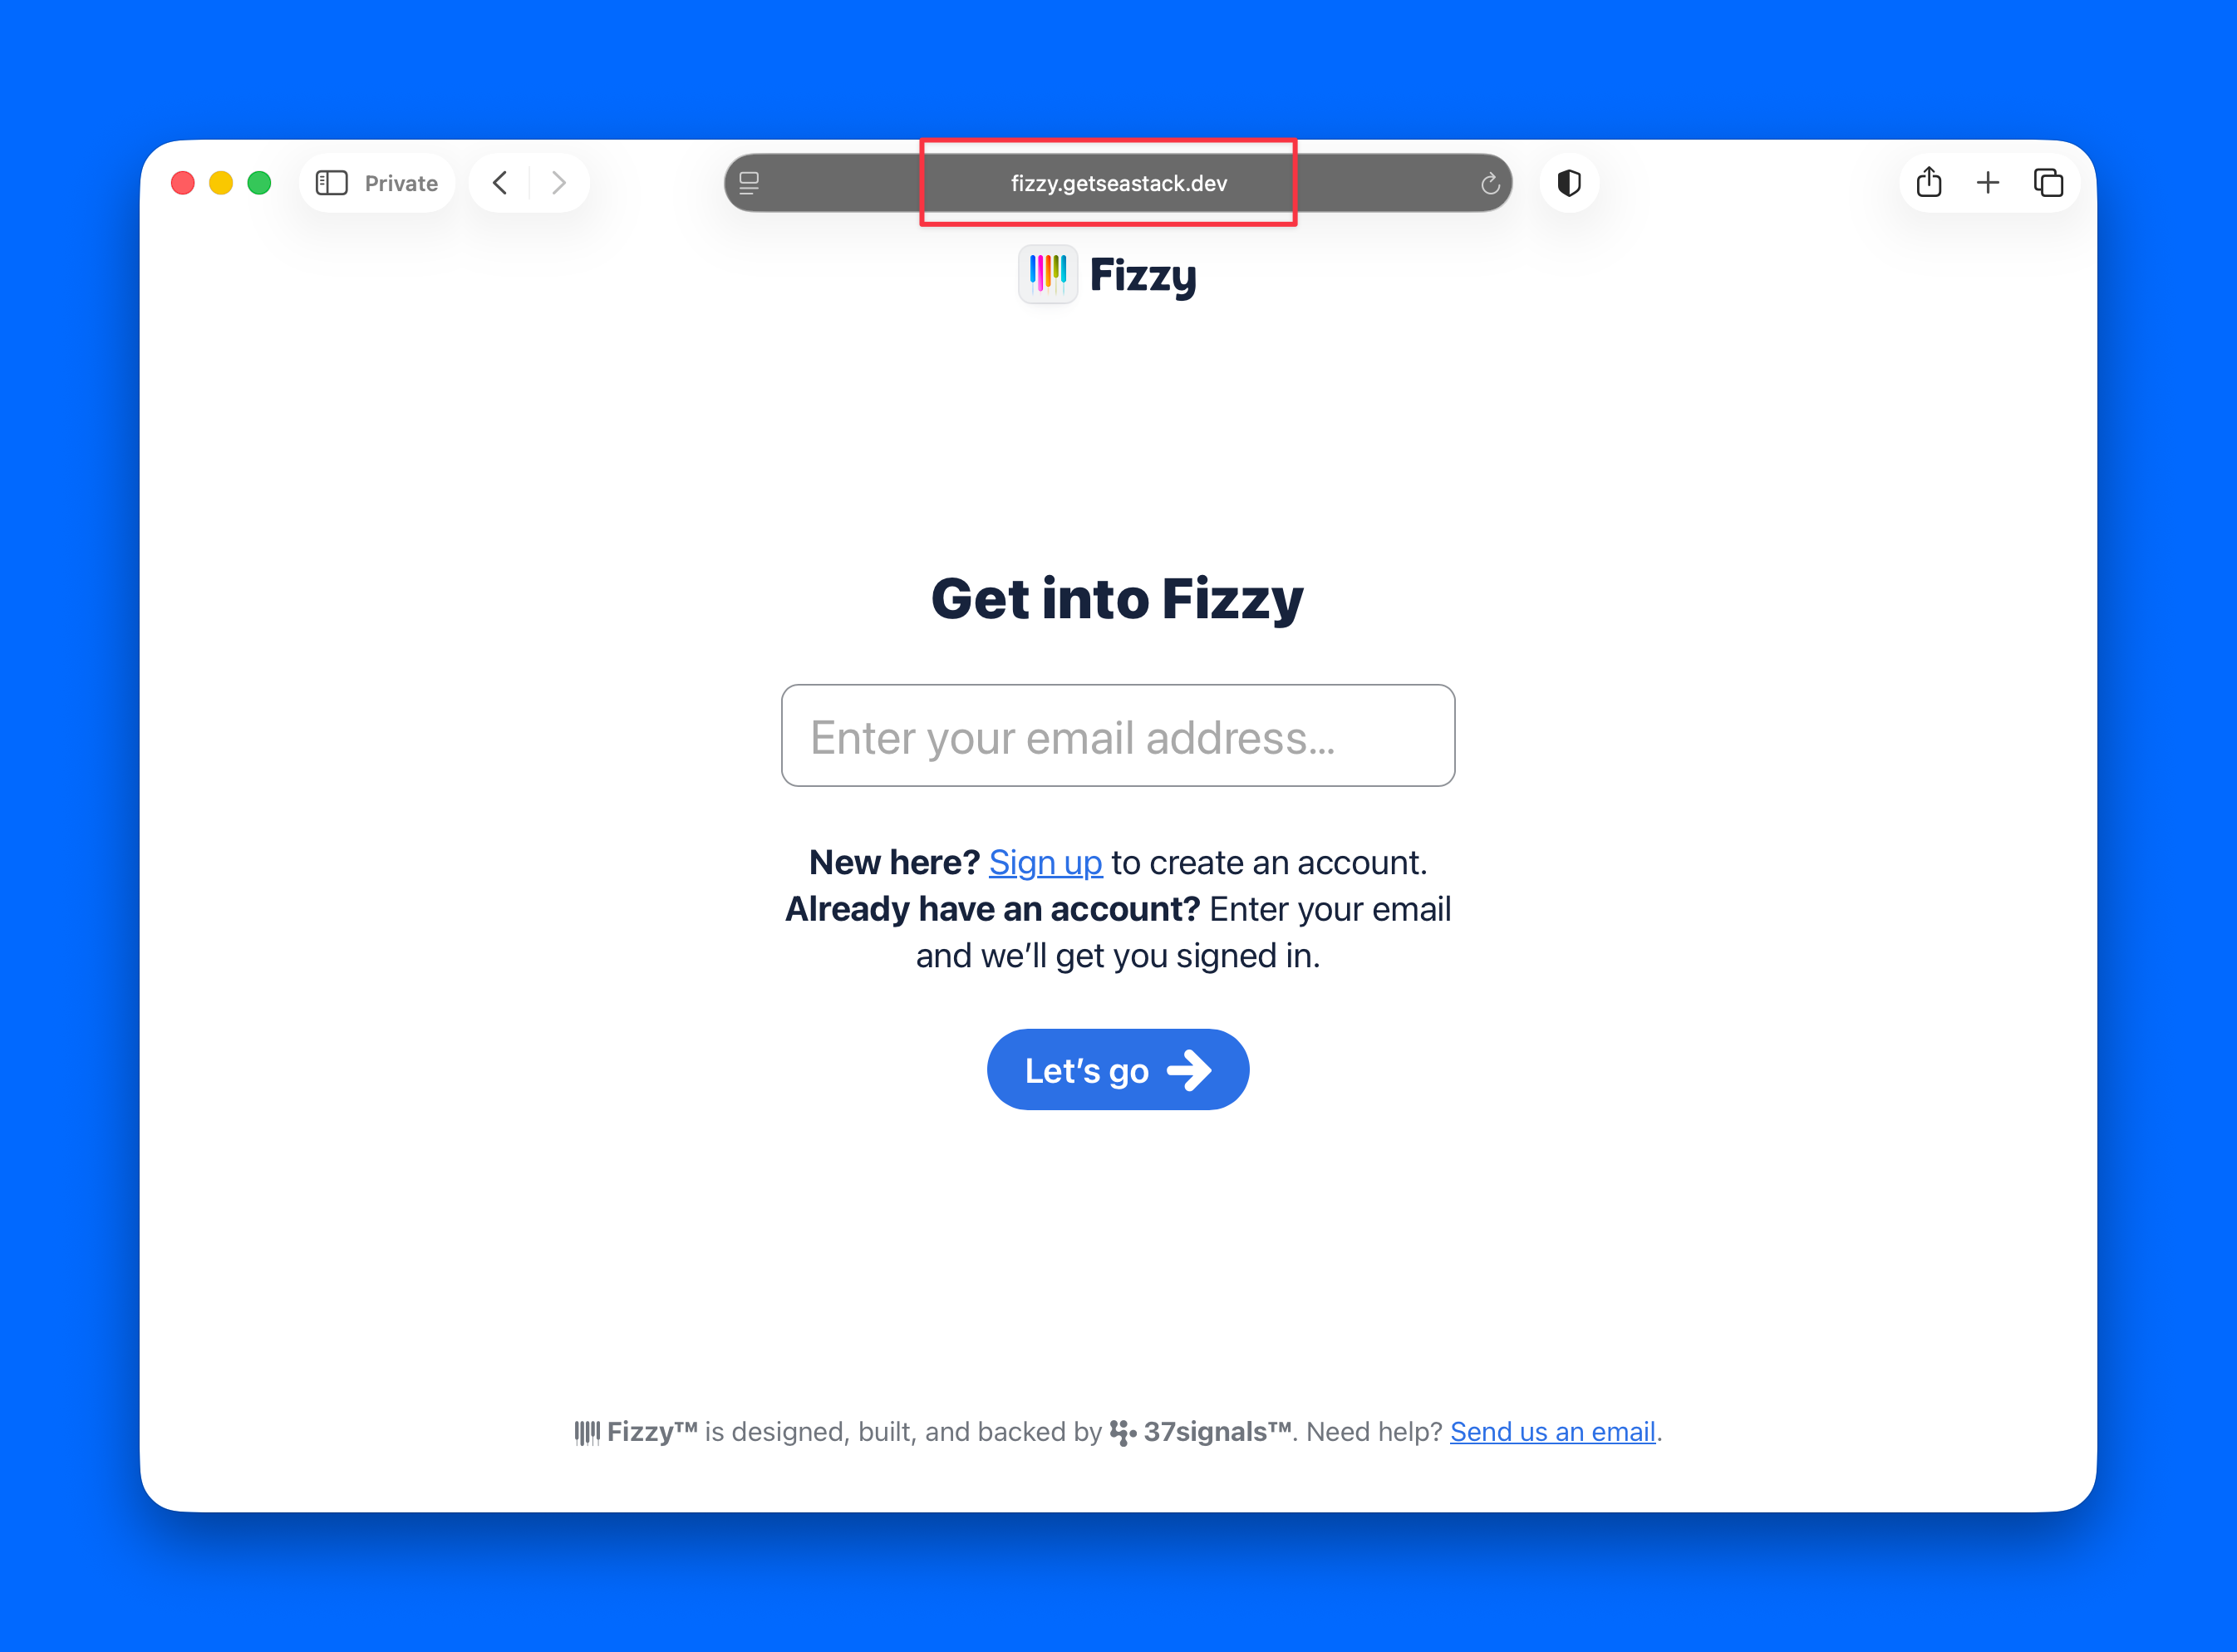
Step 8: Verify Deployment
Open a browser and go to your Fizzy URL:
- Option A (with domain):
https://fizzy.yourdomain.com - Option B (IP only):
http://YOUR_DROPLET_IP
Warning: If you deployed without SSL (Option B), you must use http:// — not https://. Your browser may try to redirect to HTTPS automatically; if the page doesn’t load, make sure you’re using HTTP.
You should see the Fizzy interface. The app is now running.
But you cannot log in yet — and that’s expected.
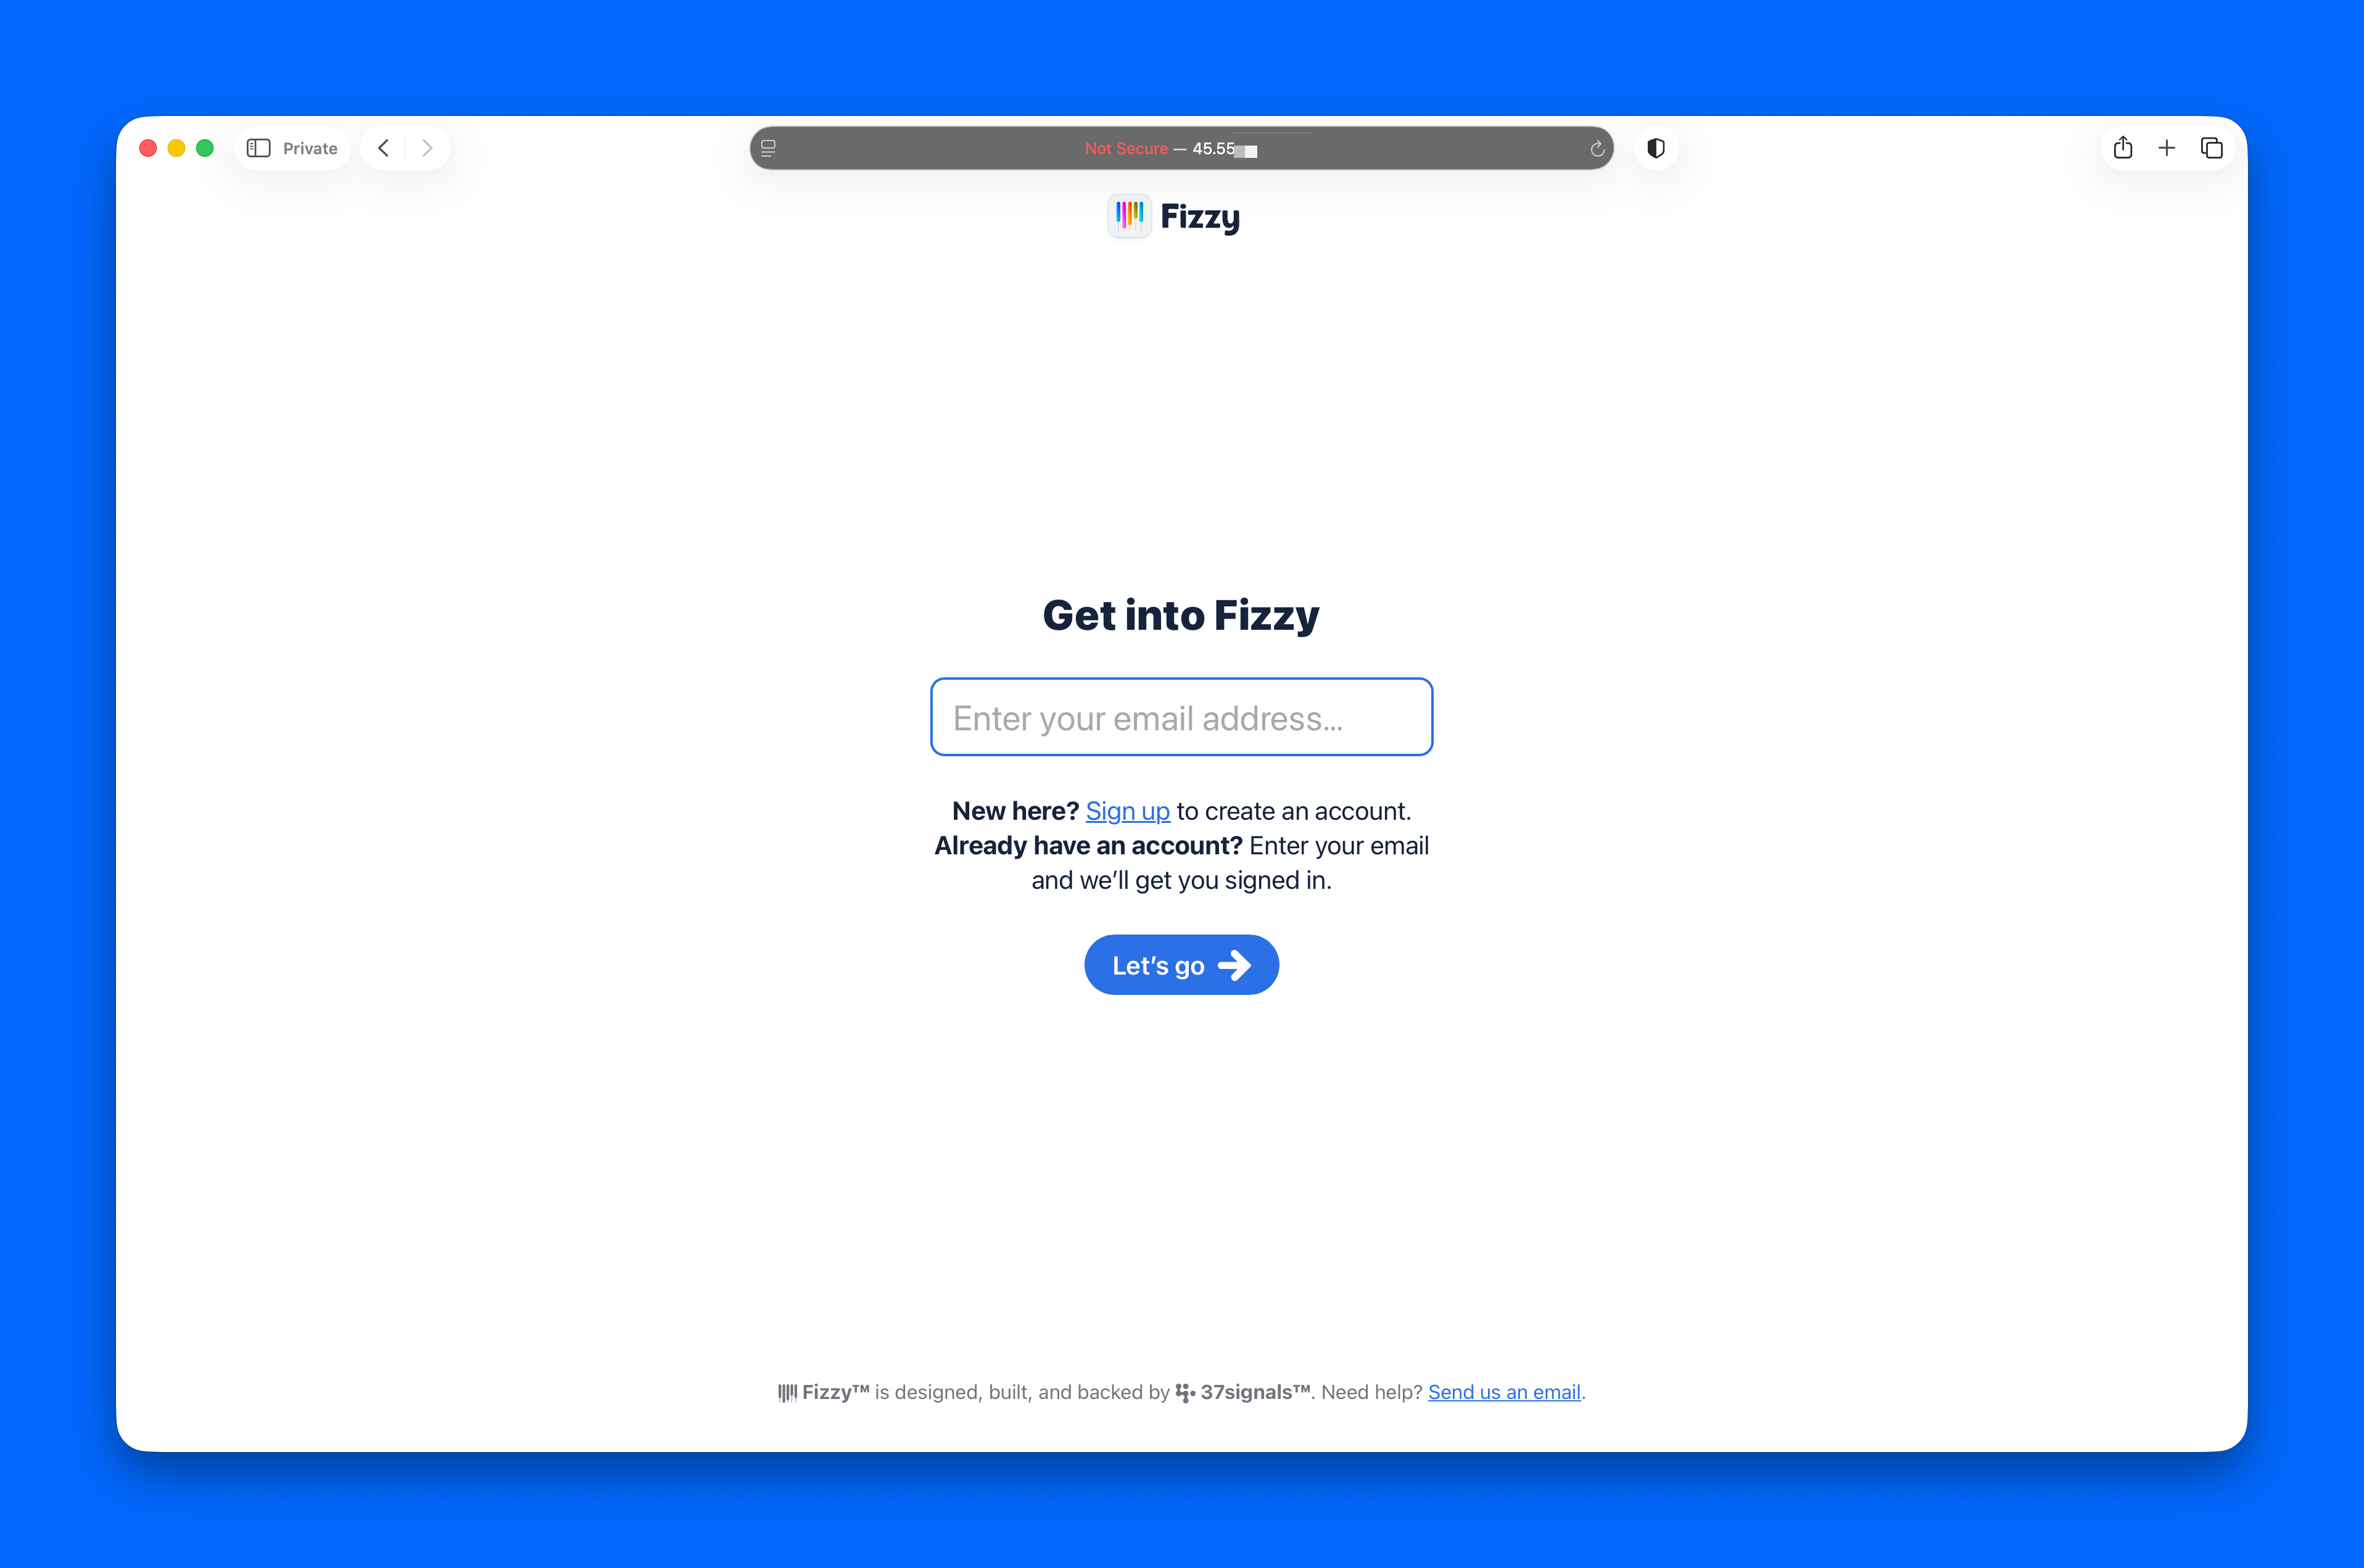
Email Setup (Required for Logging Into Fizzy)
Fizzy uses email verification codes for signup and login. Without email configured, you’ll see the signup screen, but the verification code will never arrive.
Since SMTP ports aren’t available on Droplets, we’ll use an email provider’s HTTP API instead — which is actually simpler and more reliable.
This guide uses Resend, but other HTTP API-based providers like SendGrid, Mailgun, Postmark, or Mailchimp Transactional will also work.
1. Create a Resend account and verify your domain
- Sign up at resend.com
- Add and verify your sending domain (e.g.,
yourdomain.com) - Create an API key and copy it
2. Add the resend gem to your Gemfile
# Features
gem "resend"
Then run:
bundle install
3. Update config/environments/production.rb
Replace the existing SMTP configuration block with this updated version that prioritizes Resend’s HTTP API:
Rails.application.configure do
  # Settings specified here will take precedence over those in config/application.rb.

  # Email provider Settings
  #
  # Resend API (HTTP-based, no SMTP ports needed)
  if resend_api_key = ENV["RESEND_API_KEY"].presence
    Resend.api_key = resend_api_key
    config.action_mailer.delivery_method = :resend
  # SMTP fallback - can be configured via environment variables.
  elsif smtp_address = ENV["SMTP_ADDRESS"].presence
    config.action_mailer.delivery_method = :smtp
    config.action_mailer.smtp_settings = {
      address: smtp_address,
      port: ENV.fetch("SMTP_PORT", "587").to_i,
      domain: ENV.fetch("SMTP_DOMAIN", nil),
      user_name: ENV.fetch("SMTP_USERNAME", nil),
      password: ENV.fetch("SMTP_PASSWORD", nil),
      authentication: ENV.fetch("SMTP_AUTHENTICATION", "plain"),
      enable_starttls_auto: ENV.fetch("SMTP_ENABLE_STARTTLS_AUTO", "true") == "true"
    }
  end

  # ... rest of the file remains unchanged ...
4. Update config/deploy.yml
Add RESEND_API_KEY to your secrets and MAILER_FROM_ADDRESS to your clear env vars:
env:
  secret:
    - RESEND_API_KEY
  clear:
    MAILER_FROM_ADDRESS: notifications@yourdomain.com  # Must match your verified Resend domain
5. Add your API key to .kamal/secrets
RESEND_API_KEY=re_your_api_key_here
6. Deploy the changes
git add -A
git commit -m "Configure Resend for email delivery"
bin/kamal deploy
7. Test email delivery
After deployment, try signing up or logging in. You should receive the verification code email within seconds.
You can also test from the Rails console:
bin/kamal console
ApplicationMailer.new.mail(
  from: "notifications@yourdomain.com",  # Must be from your verified Resend domain
  to: "your@email.com",
  subject: "Test",
  body: "Test email"
).deliver
Note: The from address must use a domain you’ve verified in Resend (e.g., notifications@yourdomain.com). Emails from unverified domains will fail.
Step 9: Sign Up and Log In
Now that email is configured, you can create your first account:
- Go to your Fizzy URL in your browser (e.g.,
https://fizzy.yourdomain.comif using SSL, orhttp://YOUR_DROPLET_IPif not) - Enter your email address and click Sign up
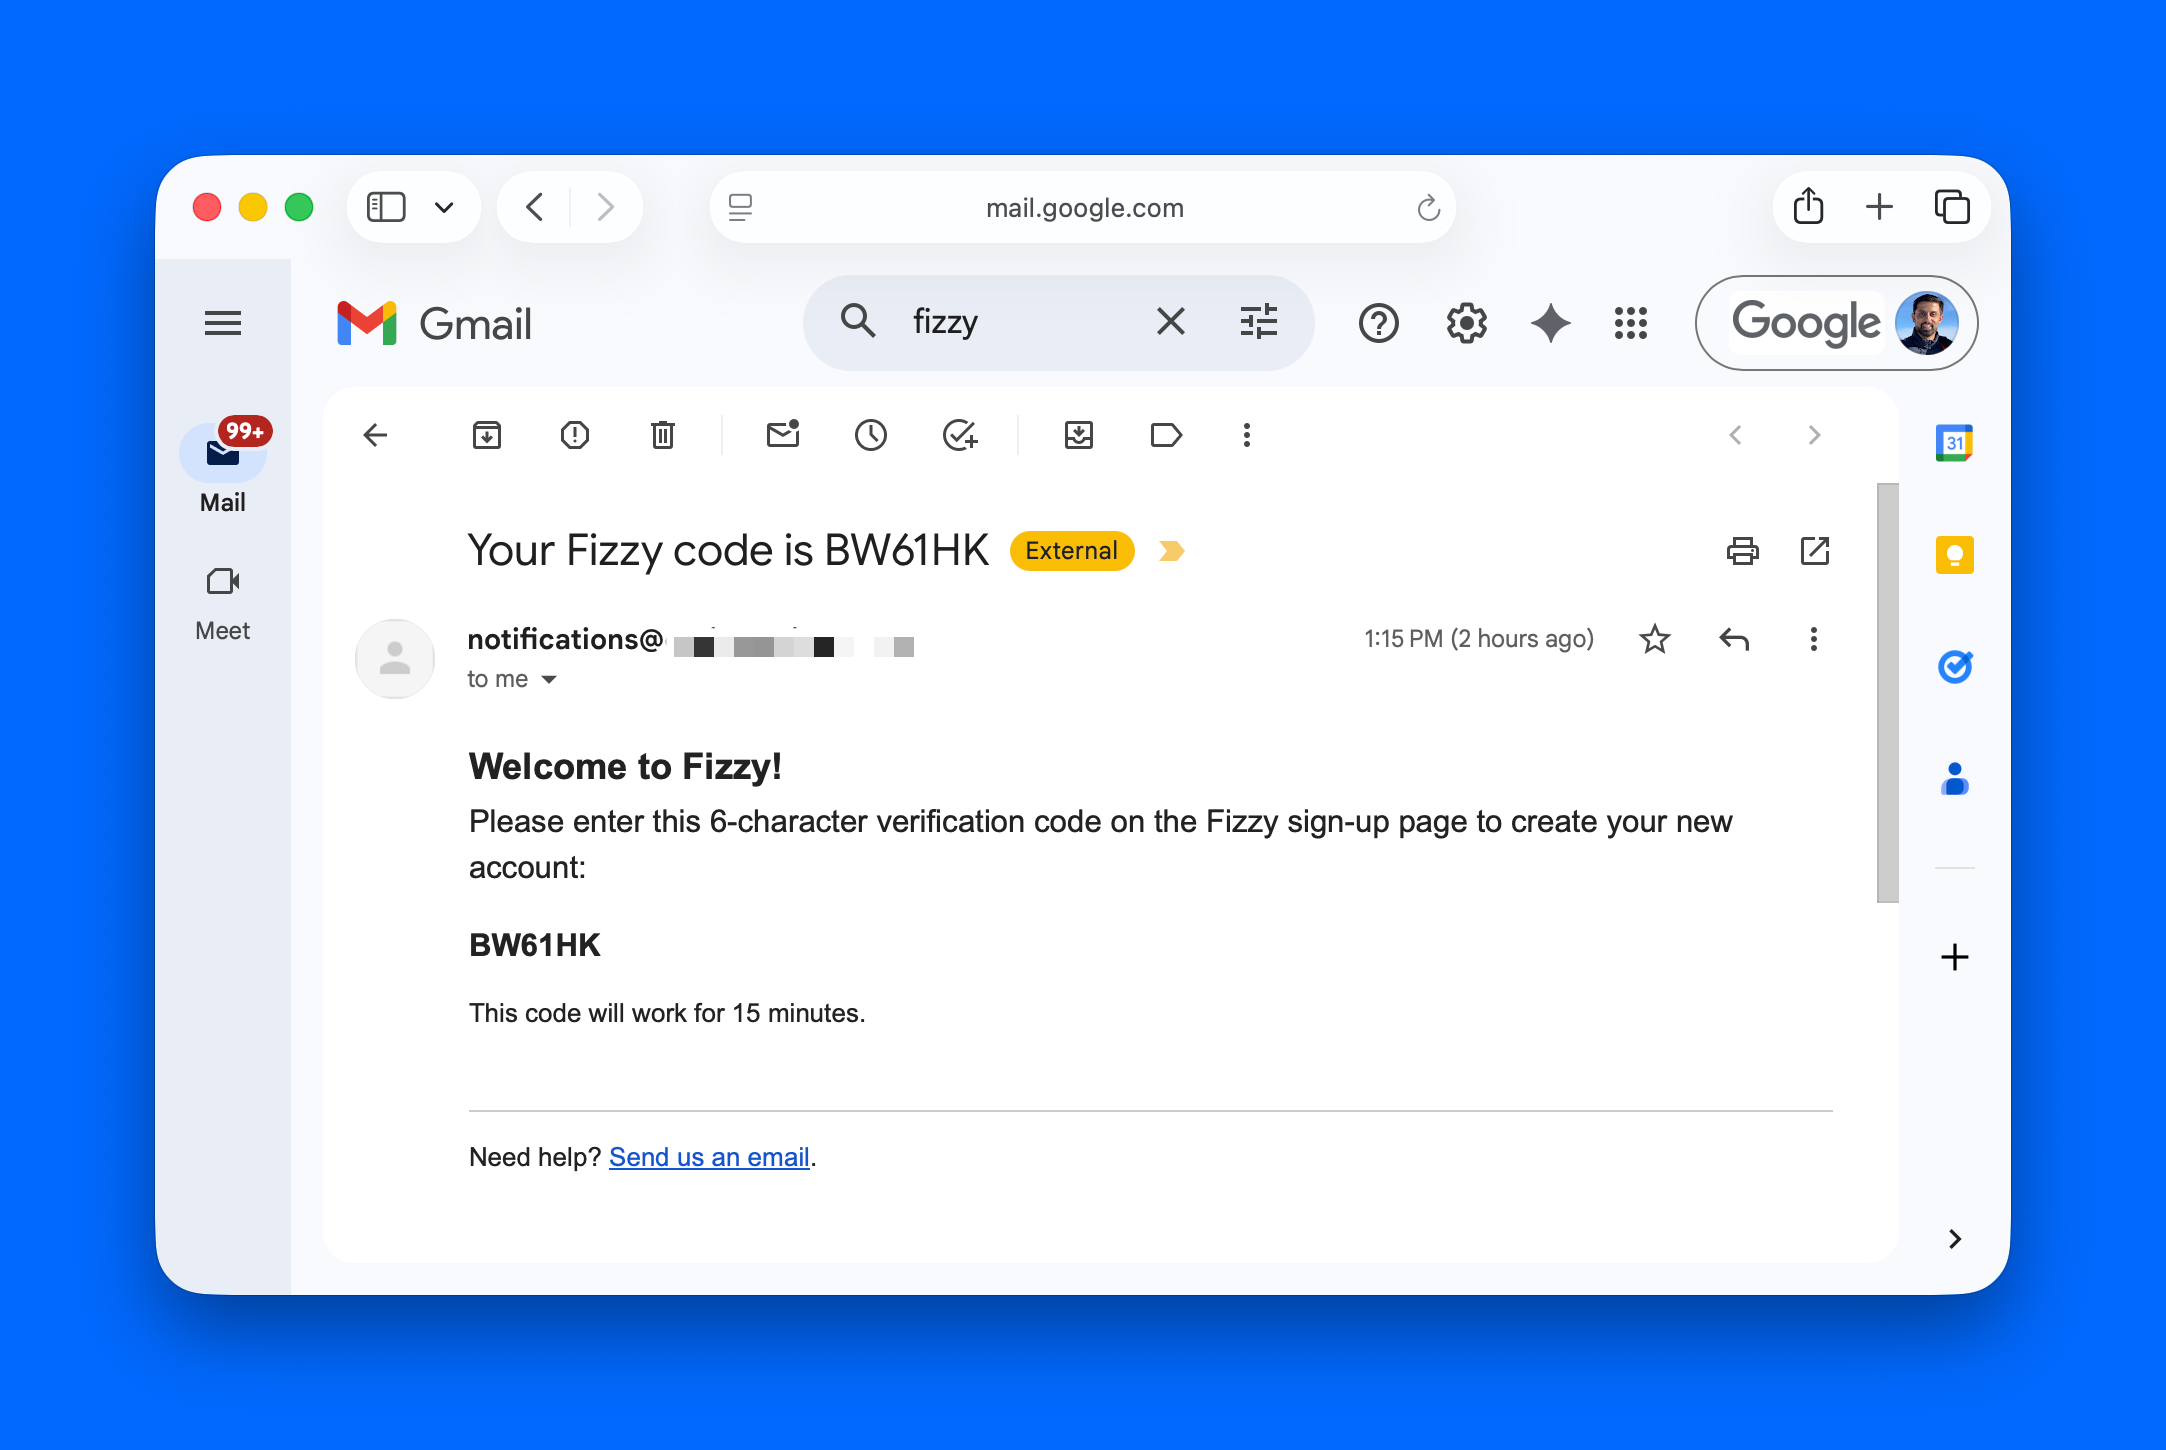
- Check your inbox for an email from Fizzy containing a 6-digit verification code
- Enter the code on the verification screen
Once verified, you’ll be logged in and see the Fizzy dashboard:
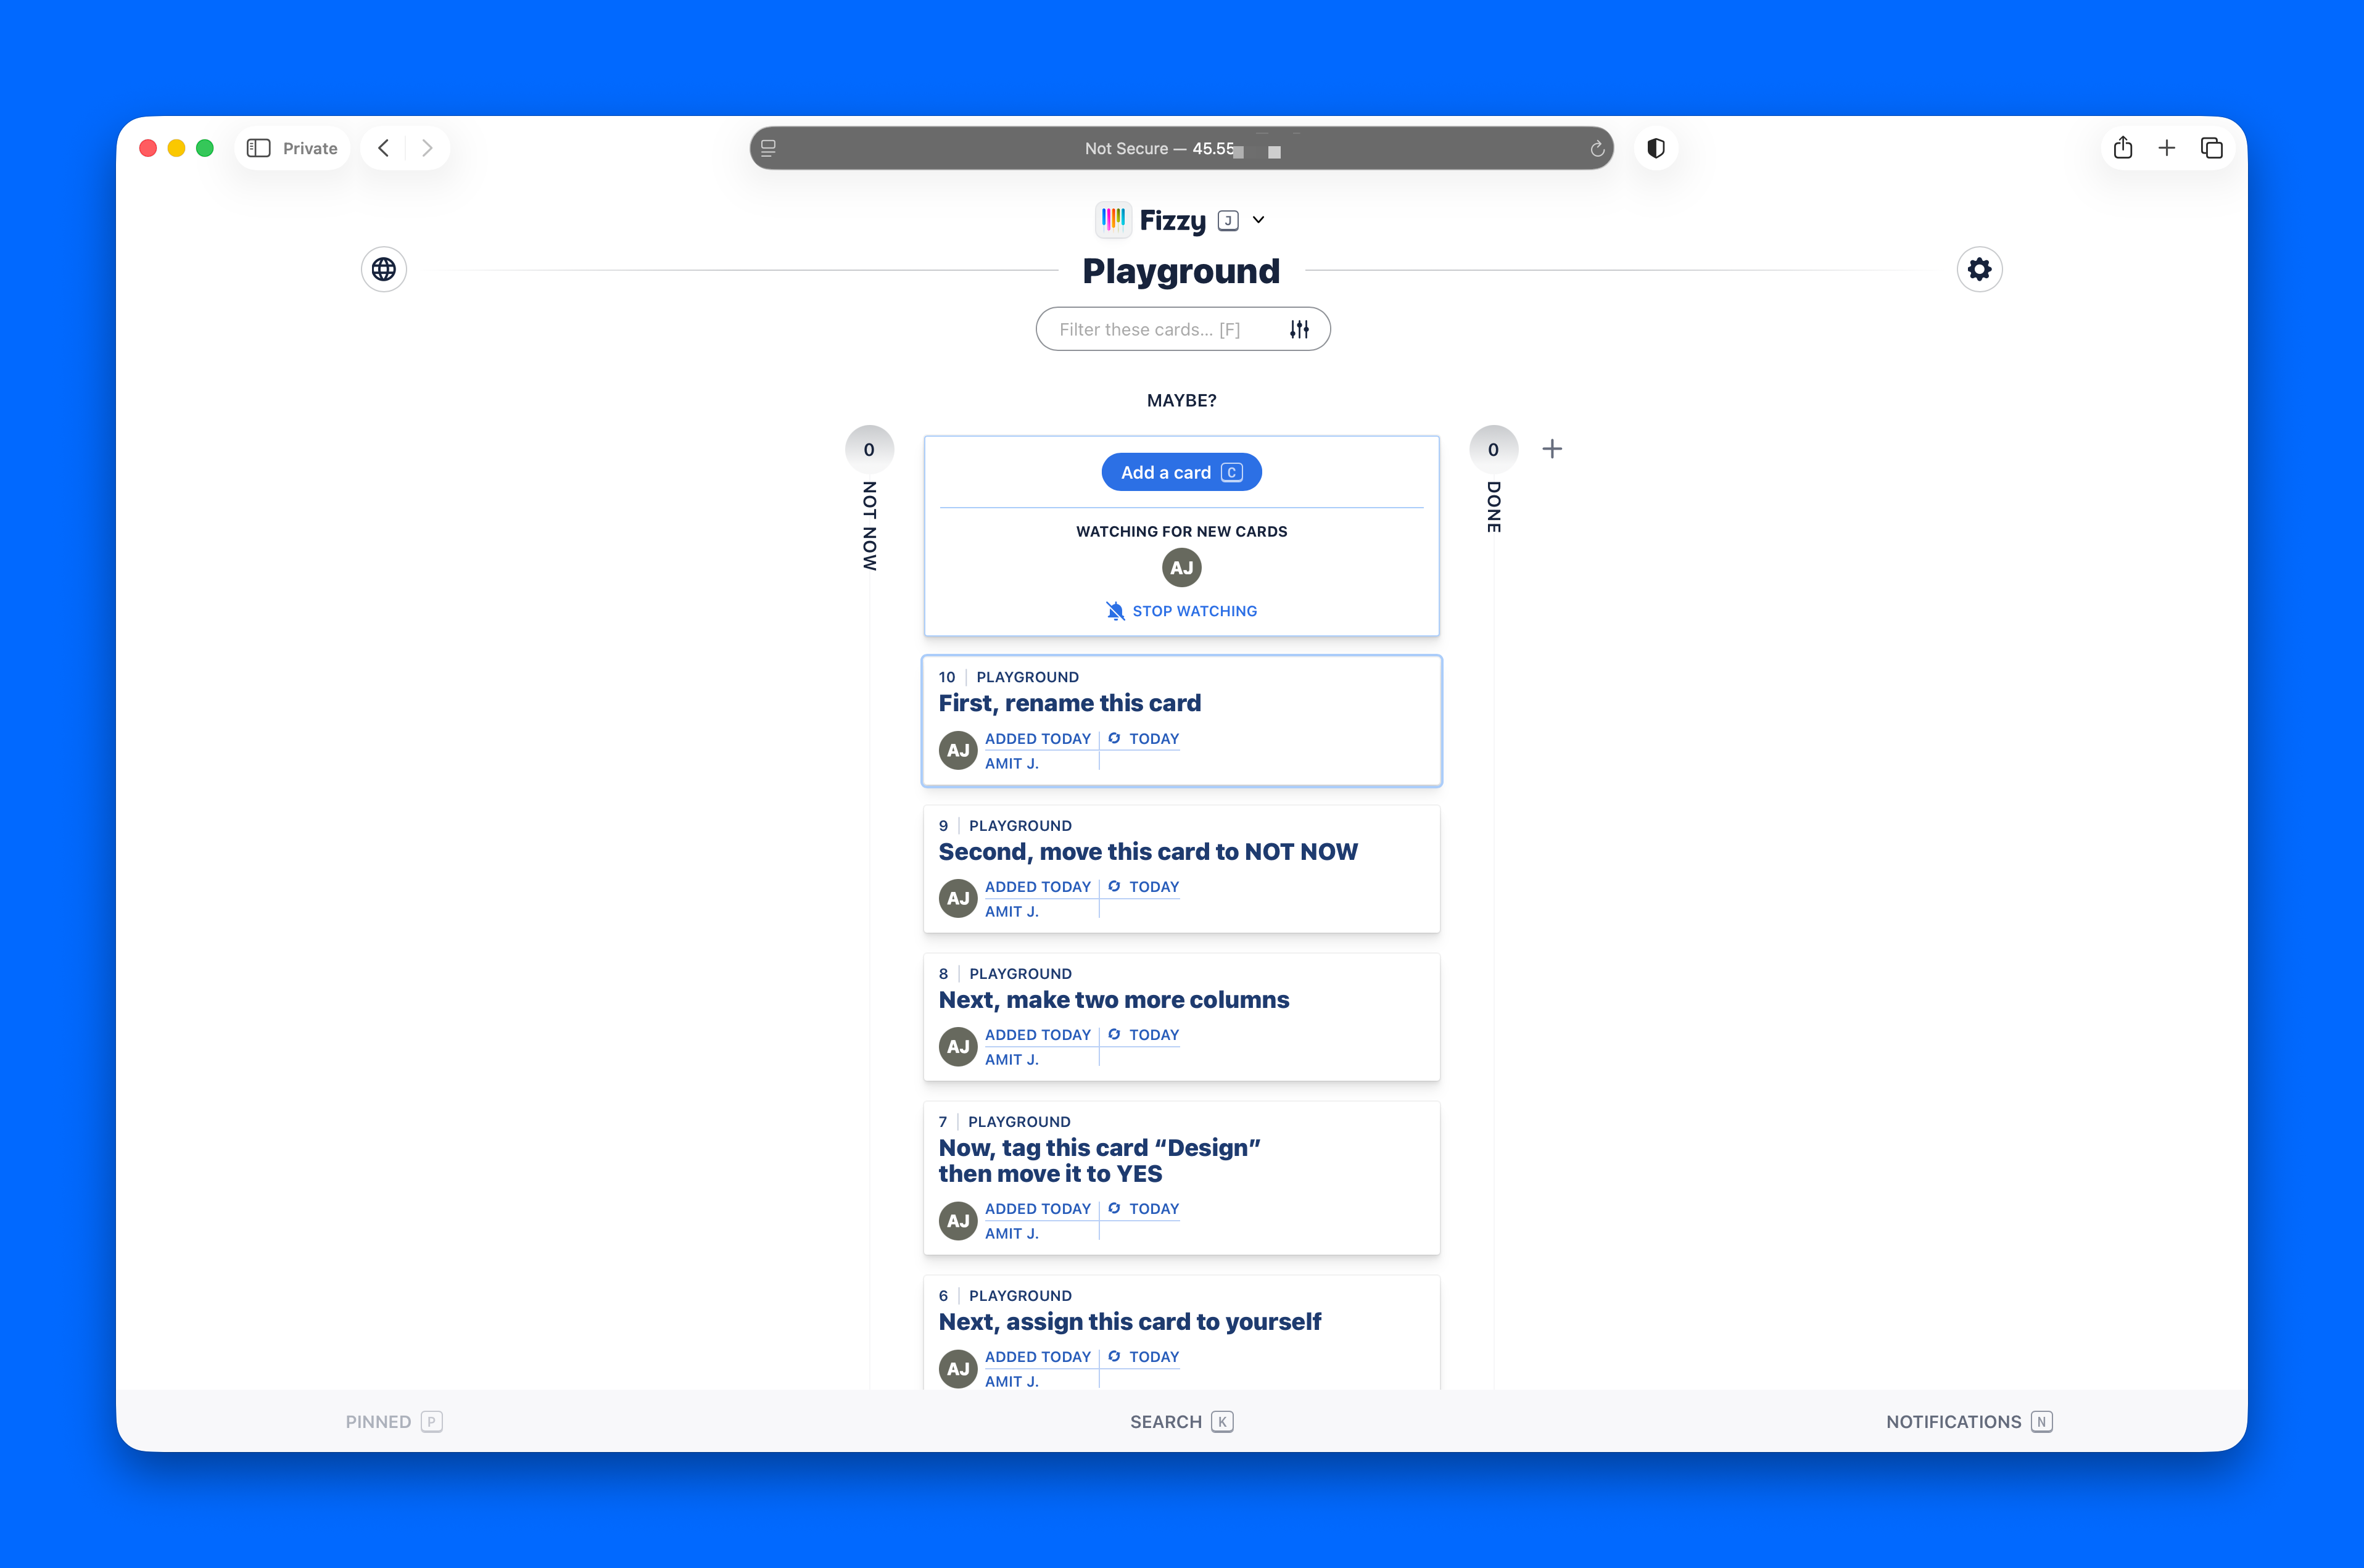
Your Fizzy instance is now fully set up and ready to use!
Adding a Domain and Enabling SSL
If you followed Option B earlier (IP address only, no SSL), you can upgrade to a secure production deployment by adding a domain and enabling SSL. Kamal makes this easy by automatically provisioning certificates via Let’s Encrypt.
-
Add your domain to DigitalOcean and point it to your Droplet’s IP address
-
Update
config/deploy.yml:proxy: ssl: true host: fizzy.yourdomain.com env: clear: ASSUME_SSL: "true" FORCE_SSL: "true" -
Commit and redeploy:
git add config/deploy.yml
git commit -m "Enable SSL with custom domain"
bin/kamal deploy
That’s it — you’re running your own Fizzy instance on a DigitalOcean Droplet. Enjoy!
Thanks for learning with the DigitalOcean Community. Check out our offerings for compute, storage, networking, and managed databases.
About the author
Amit is a Developer Advocate at DigitalOcean 🐳, where he helps developers build and ship better apps on the cloud. Compulsive Seinfeld quoter. LEGO nerd. 🧱 AMA.
Still looking for an answer?
This textbox defaults to using Markdown to format your answer.
You can type !ref in this text area to quickly search our full set of tutorials, documentation & marketplace offerings and insert the link!
 This work is licensed under a Creative Commons Attribution-NonCommercial- ShareAlike 4.0 International License.
Become a contributor for community
Get paid to write technical tutorials and select a tech-focused charity to receive a matching donation.

DigitalOcean Documentation
Full documentation for every DigitalOcean product.

Resources for startups and SMBs
The Wave has everything you need to know about building a business, from raising funding to marketing your product.
The developer cloud
Scale up as you grow — whether you're running one virtual machine or ten thousand.

Get started for free
Sign up and get $200 in credit for your first 60 days with DigitalOcean.*

*This promotional offer applies to new accounts only.